Releasing Projects
When you've finished a fangame, there's one last thing to do - release it!
Kristal provides a few different options for sharing your projects with the world. Let's take a look.
Release types
Project releases can be divided into two categories:
- Project-only releases are a quick means of distributing your projects without the engine. Users will need to download the engine separately.
- Standalone releases allow you to package your project into a custom engine build. This takes more setup, but is highly customisable and often easier for users to get playing.
You can of course release your project in more than one form as well, and it's recommended that you do so!
Before You Start
When you've made a release, you can't modify it further without making a new one. You'll need to redo the process to change anything (including your project).
Therefore, do all of your testing before packaging releases.
Project-only Releases
Releasing a project on it's own is quick and straightforward, but users will need to install Kristal separately.
This option is best for lightweight projects. (You can also follow these steps to distribute a library!)
Step 1 - Backup
Create a safe copy of your project and store it somewhere else. Nothing should go wrong, but it's not something you want to risk either way!
Step 2 - Making a ZIP archive
Now, you need to compress your project's folder into a ZIP Archive.
Windows🔗
Windows has quick compression support built into File Explorer.
Open your project, and select everything in the root folder, right click, and then select:
Compress To... > ZIP Archive(Windows 11)Send To > Compressed (zipped) Folder(Windows 10)
Mac🔗
Mac has a built-in zip compression option.
Open your project, select everything, and then right click or ctrl+click and select Compress n items.
Alternatively, open a terminal and navigate into your project's folder, and run:
zip -9 -r <YourProjectName>.zip .
Linux🔗
Open the command line and navigate into your project's folder. You can then use zip to create an archive:
zip -9 -r <YourProjectName>.zip .
That's it! The ZIP file you created contains your project, ready for sharing!
Steps for Players
If you release your project on it's own, you should give your players some additional information:
- Link them to the download guide and playing guide for Kristal.
- List the Kristal version you made the project on.
Compatibility
Projects released on their own are compatible with all OSes that Kristal supports out of the box, which are in turn the desktop OSes supported by LÖVE 11.5:
- Windows (Vista and above)
- macOS (10.11 El Capitan and above)
- Linux
If you only want to release your project in this format, skip ahead to distributing your project now.
Standalone Releases
Standalone releases involve building a custom version of the engine dedicated to running your project. Users will not need to install Kristal, but may require love2d for some platforms.
Standalone releases are good for larger projects, and give a lot more freedom of presentation, including opening up the option of main menu customisation.
Prerequisites
You should already be using the source code, but if you aren't, you will need to download a copy before creating a standalone release.
You will also need your copy of LÖVE version 11.5 (the same one used to run Kristal from sources).
Preparing the Engine
Once you have the source code of the engine, you'll want to appropriately prepare it. Let's go through all the steps and extra options for customisation.
Step 1 - Backup
Back up your project somewhere safe and separate from Kristal if you haven't already. Nothing should go wrong, but never risk it!
Step 2 - Add your projects
Open the mods folder in the root directory of the source code. It should contain the example project:
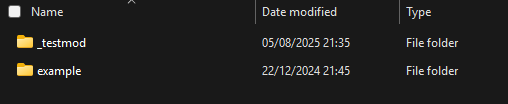
Delete it.
Then, copy your project(s) into this folder.
Step 3 - Engine configurations
Open the file src/engine/vendcust.lua. The comments in the file should instruct you on what to change. When you're done, save and close the file.
Step 4 - LÖVE configurations
Open the file conf.lua. Modify the file as the comments instruct, then save and close the file.
Step 5 - Custom Icons (optional)
Custom Icons🔗
If you want to have custom application icons, replace icon.png and bigicon.png with your custom icons.
If you wish to make a Windows executable (fused) build (see Build Types for more info), you also need to do some additional things.
First, replace icon.ico with your custom icon. Then, you'll need to generate a new icon.res file.
One way to do this is using rc, which is part of the Windows SDK and Visual Studio.
If you have Visual Studio (Not the very similarly named Visual Studio Code), you can use rc from the Visual Studio Developer Console.
Navigate to the source code and run:
rc icon.res
This should recompile icon.res for your custom icon.
Alternatively, check out LOVEs guide on Windows Distributions for other options in compiling icon.res.
Step 6 - Custom Main Menu (optional)
Step 7 - Check it works
Lastly, check that everything works correctly by opening your customised source. When you run Kristal, it should act as if you've never loaded it before - default keybinds, configs, and no save files, with a "Start game" option on the menu (if enabled).
Assuming it's all in working order, make a copy of your custom prepared source. You can then reuse this for any updates to your project later without repeating everything.
That's everything for preparing the source code. Now we're ready to start building it.
Build types
Making a standalone release of your project involves two stages - packaging into a love archive and then (optionally) fusing into executables.
Before you do anything else, you always need to make the .love archive of your prepared engine source. It can be used as a cross-platform release of your project,
but is not directly executable - it requires the user to download LÖVE separately and run the archive through it.
Ideally, standalone projects should actually be standalone, which is what fusing does - but must be done separately for each platform you release a fused application for.
It's generally best to provide the .love archive version of your project as well as any fused executables, so as to not harm platform compatibility.
From here, we'll mostly be following the standard process for distributing games made with LÖVE. You can also check out the official LÖVE guide, linked at the bottom of this page.
Making a .love Archive
A .love archive is actually just a .zip archive (shocked face). That's great for us, because it means it's very simple to make.
Step 1 - Making a ZIP archive
Compress your source code into a ZIP Archive:
Windows🔗
Windows has quick compression support built into File Explorer.
Open your source code and select everything, right click, and then select:
Compress To... > ZIP Archive(Windows 11)Send To > Compressed (zipped) Folder(Windows 10)
Mac🔗
Mac has a built-in zip compression option.
Open your source code, select everything, and then right click or ctrl+click and select Compress n items.
Alternatively, open a terminal and navigate into the source code folder, and run:
zip -9 -r <YourProjectName>.zip .
Linux🔗
Open the command line and navigate inside the source code folder. You can then use zip to create an archive:
zip -9 -r <YourProjectName>.zip .
Step 2 - Rename your archive
When you've got your compressed archive, change the extension from .zip to .love.
Step 3 - Check if it works!
Run your new .love archive with LÖVE 11.5 to check that it works.
If you get an immediate error saying "no code to run", then you have likely compressed the outer folder of the source code as well. Repeat step 1, making sure to only copy the contents of the source, and not the containing folder.
Otherwise, if everything has loaded correctly, your archive is ready!
Compatibility
As previously mentioned, a .love archive is compatible with all OSes that are supported by love2d 11.5:
- Windows (Vista and above)
- macOS (10.11 El Capitan and above)
- Linux
Steps for Players
Players will need to install LÖVE 11.5 to their system in order to run your project from the .love archive:
- Link them to LÖVE's main page, and tell them to download and install version 11.5 for their OS.
- Once love is installed, they should be able to open the
.lovearchive directly, or by runninglove <your-project-name>.lovein the command line.
Making Fused Executables
After making a .love archive, you can consider making fused executables for some platforms. These combine the .love archive and LÖVE itself together, so the user only has to download your project and run it like an application.
When you distribute your game as a fused executable, you must include the love2d license file, license.txt in your distribution.
Fused executables are platform specific.
Windows Executables🔗
Building a Windows executable will require the love2d-11.5 package for Windows.
Step 1 - Fusing
First, we'll need to create the executable itself. This is platform-specific.
On Windows🔗
Start by opening a terminal inside your LÖVE folder (if you used the installer, this is likely C:\Program Files\LOVE\).
Then, if you use Command Prompt, run this command, appropriately substituting the values in the <> angle brackets:
copy /b love.exe+"<Path\To\YourLoveArchive>.love" <YourProjectName>.exe
Alternatively, if you use Windows PowerShell, run this with the same substitutions:
Get-Content love.exe,"<Path\To\YourLoveArchive>.love" -Encoding Byte | Set-Content <YourProjectName>.exe -Encoding Byte
This will create a fused executable file for your project.
On macOS/Linux:🔗
Open the love2d-11.5 package for Windows in a terminal/command-line, substitute in the () bracket values, and then run:
cat love.exe "(Path\To\YourLoveArchive).love" > (YourProjectName).exe
This will create a fused Windows executable for your project.
Step 2 - Packaging
Once you've obtained your executable, you'll need to package it into a new archive with additional files.
Start by creating a new archive, something like YourProjectName-1.0-win.zip.
Copy your executable, as well as license.txt from the LÖVE folder, and all the .dll files in the LÖVE folder to this new archive.
Your Windows fused release is ready! To share this build, you'll want to distribute the archive you just created.
You should also check that it works if you're on Windows by trying to extract and run it yourself.
Mac Applications🔗
Building a Mac application will require the love2d-11.5 package for macOS.
Step 1
Rename love.app to YourProjectName.app.
Step 2
Copy your .love archive into YourProjectName.app/Contents/Resources/. (On macOS, Right-click or ctrl-click and "Show Package Content" to enter the .app file).
Step 3
Open YourProjectName.app/Contents/Info.plist.
You will need to change the values of some of the XML tags in this file:
- Find
CFBundleIdentifier, and change the value between the below<string>s. - Find
CfBundleName, and change the value between the below<string>s to the name of your project. - Find
UTExportedTypeDeclarationsand remove that key, as well as the whole array directly below it (including the<key>and<array>tags around the values)
Save and close the file.
Step 4
Zip the folder containing your .app file back up into an archive. Call it something like YourProjectName-1.0-osx.zip.
When zipping with the command line, use the -y flag to preserve the symlinks.
Your macOS fused release is ready! To share this build, you'll want to distribute the archive you just created.
You should also check that it works if you're on macOS, by trying to extract and run it yourself.
Linux AppImages🔗
AppImage is a format for packaging applications on Linux. LÖVE has an official AppImage for Linux, which is capable of being fused with .love files.
This is a more involved process than regular fusing, so it's best done by following the official LÖVE Distribution For Linux guide. You should follow the "Official AppImage" subsection, with your "game" being the .love archive you created earlier.
Compatibility
Fused executables are only compatible with the platform they have been built for.
Steps for Players
Playing projects from a fused executable is very easy:
- Extract the downloaded archive.
- Run the executable/application.
Distributing
With all your preferred releases for your project ready, all that's left to do is release them!
You can share your work anywhere, but if you're looking for Kristal-specific spaces,
there is a Kristal GameBanana,
as well as the Kristal Discord Server which has it's own project-releases forum.
When you release your project, don't forget to give appropriate credits!
An acknowledgement of the engine itself is recommended; a lot of work goes into making an engine like this. The best place to link for Kristal is the front page of the website: https://kristal.cc/.
See also
- Game Distribution on the LÖVE2D wiki
- LOVE2D License on GitHub
- Kristal License on GitHub