Cutscenes
This tutorial assumes you have read the previous ones. If you haven't, please do so before continuing.
Let's make a simple cutscene, where:
- The player walks to the center of the room
- The screen fades to black
- A textbox appears
- An impact sound plays
- The screen fades back in
That's just a set of instructions, isn't it? In order? Yeah, that's pretty much what cutscenes are in code as well!
Let's start by marking the center of the room. Remember markers?

Let's also place down a script object. This'll trigger our cutscene when the player touches it.
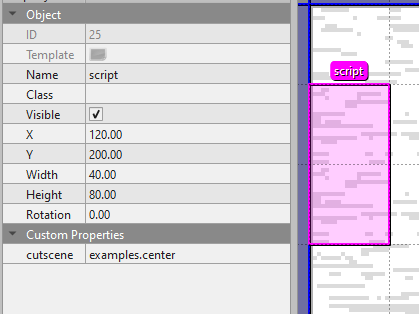
As you can see, we gave it the cutscene ID examples.center. This means it'll play the center cutscene from the examples group!
Now, let's make the examples group. We'll do this by creating an examples.lua file in the scripts/world/cutscenes folder.
Let's slap a table in there:
return {

}
Now we're ready to start our cutscene! Remember, we named it center, so let's do that:
return {
    center = function(cutscene, event)

    end
}
Woah, what'd we just do?
We just created center in the examples group, which is a function that takes two arguments: cutscene and event. cutscene is the cutscene object, and event is the event object, aka what triggered the cutscene.
Now, let's script the cutscene!
return {
    center = function(cutscene, event)
        -- make kris walk to the "room_center" marker, taking 1 second, and wait until they're done
        cutscene:wait(cutscene:walkTo("kris", "room_center", 1))

        -- fade the screen to black
        cutscene:wait(cutscene:fadeOut(1))

        -- show a textbox
        cutscene:text("* ...")

        -- play the impact sound
        Assets.playSound("impact")

        -- wait 1 second
        cutscene:wait(1)

        -- fade the screen back in
        cutscene:wait(cutscene:fadeIn(1))
    end
}
Seems pretty simple, right? The cutscene system is much, much more powerful than this, but it's a good start.
Ending A Cutscene
Cutscenes are just lines of code, except it can be paused using a special system called coroutines. We don't need to get into those, though, but the important part is that cutscenes are code.
Meaning, to leave a cutscene early, you just have to type return!
    cutscene:text("* This is an example.")

    if some_condition then
        cutscene:text("* Condition met![wait:5]\n* The cutscene will now end!")
        return -- Exit the cutscene early, so nothing below this runs!
    end

    cutscene:text("* Ooh,[wait:5] you haven't met the condition![wait:5]\n* That's too bad...")
NOTE: Do NOT call cutscene:endCutscene() to end a cutscene. It's an internal function, and will cause problems if you use it.
Choices
Choices are done through what we call "Choicers" or "Choiceboxes", and they're similar to textboxes.
For the example we've been going with, we've been doing things in the "world", and not inside of a battle. This means we're using a WorldCutscene, and what we'll want to use is WorldCutscene:choicer().
In a WorldCutscene, you can use the following code to show a choicebox:
    cutscene:text("* I'm about to ask you something...[wait:5] is that okay?") -- Show a textbox, which automatically waits for player input
    cutscene:choicer({"Yes", "No"}) -- Ask a question, automatically wait for player input
    cutscene:text("* Thanks for your answer!") -- Show another textbox
We just made a choice box! But that seemed pretty useless, because we didn't even do anything with their choice!
Thankfully, we can grab the player's choice from the return value. Meaning, the choicer will give us the choice!
local option = cutscene:choicer({"Yes", "No"}) -- Ask a question, automatically wait for player input
Perfect. The player has now picked an option, and it's stored in the option variable. It's a number, starting from 1, for which choice they picked.
In this case, if they picked "Yes", option would be 1, and if they picked "No", option would be 2.
We can then use this to do different things based on their choice:
    local option = cutscene:choicer({"Yes", "No"}) -- Ask a question, automatically wait for player input

    if option == 1 then
        -- We picked "Yes", option 1!
        cutscene:text("* Awesome,[wait:5] I'll do that now.")
    else
        -- We picked literally anything else.
        cutscene:text("* Ah...[wait:5] that's okay.[wait:5]\n* Maybe next time...")
    end
Of course, don't get fooled by this example; you can do way more complex things with choices, like even have three, or four:
    local option = cutscene:choicer({"Yes", "No", "Maybe", "We'll See"}) -- Ask a question, automatically wait for player input

    if option == 1 then
        -- We picked "Yes", option 1!
        cutscene:text("* Awesome,[wait:5] I'll do that now.")
    elseif option == 2 then
        -- We picked "No", option 2!
        cutscene:text("* Ah...[wait:5] that's okay.[wait:5]\n* Maybe next time...")
    elseif option == 3 then
        -- We picked "Maybe", option 3!
        cutscene:text("* Maybe...?[wait:5]\n* I'm not sure how to take that.")
    else
        -- We picked "We'll See", option 4! Again, this is "any other option", but there's only one other option, which is this one.
        cutscene:text("* Um...[wait:5] sorry,[wait:5] could you be more clear?")
    end
You can do many things with choices, whether it's branching dialogue, or letting the story completely diverge. It's up to you!
The last example I have is a bit excessive, but take a look and try to understand it.
    cutscene:text("* I'm about to ask you something...[wait:5] is that okay?") -- Show a textbox, which automatically waits for player input
    local option = cutscene:choicer({"Yes", "No", "Go Away"}) -- Ask a question, automatically wait for player input

    if option == 1 then
        -- We picked "Yes", option 1!
        cutscene:text("* Are you okay with what's happening?")
        local option_new = cutscene:choicer({"Yes", "No"}) -- Ask a question, automatically wait for player input
        if option_new == 1 then
            cutscene:text("* I'm glad.[wait:5]\n* Tutorials are scary,[wait:5] but you can do it!")
        else
            cutscene:text("* Yeah,[wait:5] I understand.")
            cutscene:text("* Do your best!")
        end
    elseif option == 2 then
        -- We picked "No", option 2!
        cutscene:text("* Ah...[wait:5] that's okay.[wait:5]\n* Maybe next time...")
    else -- We picked the only remaining option, "Go Away", option 3!
        cutscene:text("* I...[wait:5] see.")
        cutscene:text("* Sorry for bothering you then.")
        return -- Exit the cutscene early, so nothing below this runs!
    end

    -- Both choices "yes" and "no" lead to the same thing.

    cutscene:text("* In any case,[wait:5] I'm just...[wait:5] glad to see you again.")
What Cutscenes Shouldn't Do
Cutscenes are a powerful tool, which allow many things. However, if you start using them for things they aren't meant for, it can become difficult to maintain your code, and it will become harder for others to help you if you run into issues.
Some common examples:
- Using the cutscene system for new mechanics, a minigame, or a puzzle of some kind.
- Using the cutscene system for something that isn't actually a cutscene.
- Using the cutscene system just to get a
waitfunction.
Generally, if your cutscene requires player input aside from advancing, or choices, then you're probably doing too much with the cutscene system.
Kristal is a versatile engine, but using some systems for the wrong purpose can end up hurting your project in the long run.
What Do I Do Instead?
If you find yourself doing any of the above, here are some alternatives:
New Mechanic🔗
It heavily depends on the mechanic, but generally, you'll want a "controller object". An object which handles the mechanic, the same way that battles are handled by Battle and textboxes are handled by Textbox.
If you're doing something like adding climbing (like Chapter 4), then you would want to handle that as a part of Player.
Not a Cutscene🔗
If it's not a cutscene, then it probably shouldn't be in the cutscene system. If you're trying to use cutscenes as a very easy way to run code in like, an interactable, or a script, then you can use "scripts" instead.
There is a tutorial in the Event page for scripts.
Wait Function🔗
Generally, programming does not have "wait" functions. Sorry, but Scratch and Roblox lied to you.
There's a whole bunch of technical reasons for that, but the TL;DR is that if you find yourself needing a wait function, you're going at something the wrong angle.
Nontheless, if you need something to happen after a delay, check out timers.
Further Reading
For more information, check out the API reference pages for cutscenes, world cutscenes, and battle cutscenes.